
It’s that time of the year again.
Using less plastic!
When I first started the Inktober challenge in 2016 or so, I used the trusty Sakura Microns. They are widely available and rather inexpensive. The ink is permanent and lightfast. I still remember the thrill of getting my parents to buy some for me when I was in middle school. They feel like real artists’ tools! I especially love the burgundy ink color. The color is perfect. HOWEVER, they don’t last very long and I was going through a lot of them. It’s hard to recycle them properly and economically. If there is a way for me to create less landfill trash while extracting my creative juice from the depths of my brains, I should look into this as an advocate for conservation.
I can dig out my old Koh-i-noor technical pens, but they are a bit stiff (and probably clogged with ink and wires bent). There are refillable types available by Copic called SP Multiliners. However, the refill ink comes in plastic cartridges as far as I can tell. I haven’t tried them yet, so let me know how you like them if you use them.
Pen

I’ve been enjoying dip pens more and more these days. The soft flexible nib was uncontrollable and did everything I didn’t want it to do at first, but after practicing about ten years on-and-off, I’m finally getting a hang of it. It’s so fun and relaxing…once you get the feel of not holding the pen so tightly and to use more than just your wrist. Otherwise it’s continuous torture and frustration. I forget to breathe sometimes when I’m drawing. (Holding your breath does help a lot in making a very long, consistent line. Try at your own discretion).
Fortunately most nibs seem to fit in the Universal dip pen nib holder. I have had a few over the years. Repeat the cycle of losing one, buying another one, and finding the lost one few times, and soon you’ll have all the nib holders you need…until you actually need one and they are all hiding and giggling at you from the bottoms of your pencil cases.

Esterbrook Nib #128 Extra Fine Extra Elastic
I enjoy using antique art supplies when possible–it’s better for the environment AND the tools are better crafted and usually longer lasting. Since I fell in love with an antique Esterbrook fountain pen in early 2019, I gave the Esterbrook pen nibs a try. During one of the fountain pen conventions (I know, right?), I scored some Esterbrook #128 Extra Fine Extra Elastic nib from the friendly folks at Pendemonium.
I love this nib. It’s super fine and super flexible. I used this nib and this nib only for the 2019 Inktober. The nib doesn’t need too much pressure to give a strong line and is really responsive to various line-making techniques. It holds onto ink really well and I can happily use this for writing and drawing.
Taking Care of the Nib
When using the nib for the first time, you need to get the machining oil off. Machining oil keeps the nib from rusting for long-term storage, but it needs to be taken off so the ink flows more smoothly when using. The conventional way is to take a lighter and give it a little wave of flame to warm up and remove the oil. I’ve heard that alters the metal and is not recommended.
Alternative ways I’ve heard are:
- Taking a potato and stabbing it with the nib to clean. Apparently the starch on the potato helps scrape the oil off.
- Some people spit on the nib and dissolve the oil. Lingual lipase emulsifies the oil.
- I personally like to take an old toothbrush and a tiny bit of toothpaste to give my nib a good, gentle brushing.

The pen nib is steel and will rust without proper maintenance. (I think. Let me know if they are made of something else). To take care of the pen nibs, I wash them with soap and warm water after the drawing is done. Cleaning the nib removes excess ink and any gunk/dust picked up from the surface. It’s important to take the nib out from the holder to dry so everything dries completely. I know this from experience.
Store pen nibs in a plastic container, preferably away from other rusty nibs. I also know this from experience.
Ink
If one is a purist, all you need is black India or sumi ink. As soon as you walk in the art store, there are at least a hundred different kinds of ink. Pick one in your price range, look for “lightfast” and “acid-free” for bonus points. The bottles seem small, but don’t worry, they will last a very long time. Just don’t let them dry out!
For My 2018 Inktober, I used Sakura Microns and some calligraphy inks by Speedball. Calligraphy inks are a little bit thicker than drawing inks to me, and it takes more shaking prior to use.

For my 2019 Inktober, I used Winsor-Newton Black Indian Ink. This ink has shellac and creates a nice sheen. I chose this one since I like their watercolors a lot. The ink is very nice–it’s consistent, well mixed, and I can probably make about 60-75 illustrations using one bottle of ink. Shellac comes from bugs! I enjoy learning about the history of art materials and appreciate the ingenuities of artists from the past and all that nature has to offer.

For 2020, I was scheming to get my fingers on real Sepia ink created by a fountain pen master Hakase in Japan. Alas, the Covid pandemic has banned international shipments from Japan to the US since about March of 2020. Very bummer. I was able to communicate a little bit with the fountain pen master over email and he is super nice. I look forward to the day when international shipping resumes. My name is on the waiting list for squid ink! Very cool. 🙂
I got a new-to-me brand this year, Dr. Ph. Martin’s Bombay Black India Ink. It’s lovely, just thick enough for delicate consistent lines, and matte black. The finished art is not shiny, so I don’t have to worry about it not scanning properly.
Paper/Film
Last but not least, paper and film! When I learned pen and ink techniques in undergrad, we used both smooth paper and plastic vellum.

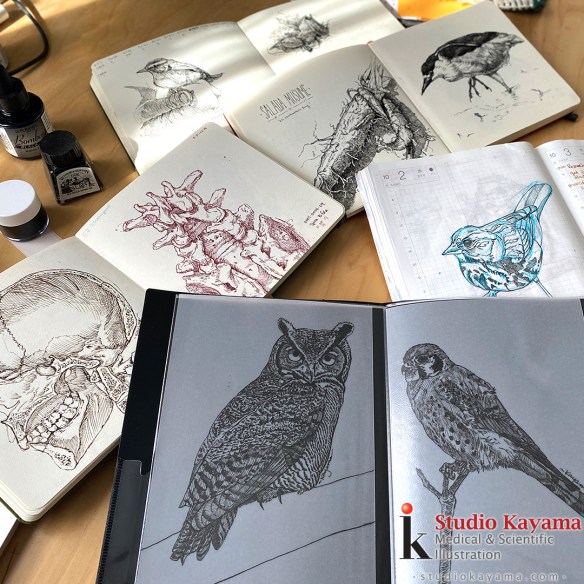
When I first started Inktober, it was important that I got some inking done every day instead of obsessing over each ink drawing. The difficult part for me is to get over the hump to start drawing. Once I start drawing it’s smooth sailing, but it takes a lot of mental energy to clear the table, get my materials together, and look up reference images for my ideas. So I made the process as accessible as possible by making my everyday sketchbook be the place where my Inktober drawing goes.
My trusty 5.5″ x 5.5″ Travelogue Handbook sketchbook is a great size to carry around and I can hold the sketchbook comfortably in my hands when I draw standing up. I used easily accessible pens (usually in my drawing bag with the sketchbook). In theory, all I had to do was to pick up the bag and open the bag. It takes a little practice though. The mind does funny things for self sabotage.

I like paper, but I love how I can overlay the vellum over the sketch and trace directly. I’ve tested few “vellum” sheets available today and I came across the Clearprint heavyweight vellum from the Chartpack sampler pack from the 2018 GNSI Conference registration packet.
Chartpack/Clearprint offers three types of vellum: Light, regular, and heavy. The heavy surface is perfect. I never feel my hand being sweaty, but thinner vellum definitely soak up the extra moisture from my hand and slightly warp and wrinkle the surface. The heavy weight vellum has a good weight as well; they don’t bend as easily as others.
With the vellum, I like to do my prelim research/sketch on my Hobonichi Cousin journal. Again, it’s a good size where it’s not too large or unwieldy and the Tomoe River Paper is really nice to work on. I also love the little inspirational/funny quotes on each page. The graph grid helps me place/measure my drawing so it’s straight and I know the sketch will fit on my vellum.

Art Size
5.5″ x 5.5″ or 5″ x 7″ are good size for me. Working too big will take too much time and this size is pretty close to the size of my hand, which feels like a natural working size. Many human bones and birds can comfortably fit in that size at 100% scale. Smaller size means smaller storage space and smaller prints to sell/lug around. Plus getting the 11×14 heavy vellum gets me 4 cuts per sheet, so this should last me for few more Inktobers.
Finished work live in the 5″ x 7″ profolios. I need to get white paper for backing so I can see the artwork.
Your Turn!
What are your favorite tools for pen and ink drawing? Did I forget something? Please share in the comments below and I look forward to seeing your work and meeting you throughout the month of October. 🙂